Showing posts with label 4 Column footer. Show all posts

Thursday, December 16, 2010

Cassius Blogger Template

Cassius Blogger Template


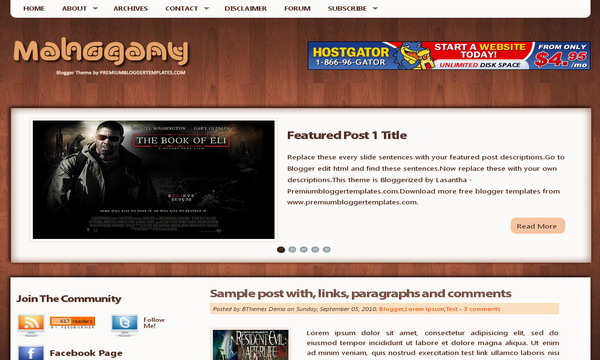
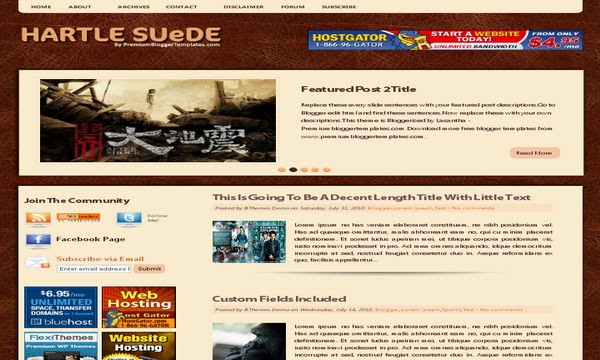
Template name : Cassius

Template type : 1 Sidebar, 2 Column, 4 Column footer, Adapted from Wordpress, Brown, Featured Section, Fixed width, Elegant, Header Banner, Magazine, Right Sidebar, Rounded corners, Slider, Top Navigation Bar, Web 2.0, White, Yellow

Release date : December 17, 2010

Coder/Designer Name(s) : Lasantha Bandara / CamelGraph

Coder/Designer URL(s) : http://www.premiumbloggertemplates.com/
http://camelgraph.com/

Basic Instructions : How to install a Blogger template

Advanced Details : http://www.premiumbloggertemplates.com/2010/12/cassius-blogger-template.html


Configure Meta tags

Login to your blogger dashboard--> layout- -> Edit HTML.Now Scroll down to where you see below codes :

<meta content='DESCRIPTION HERE' name='description'/>
<meta content='KEYWORDS HERE' name='keywords'/>

Replace DESCRIPTION HERE,KEYWORDS HERE as below.

DESCRIPTION HERE:Write your blog description
KEYWORDS HERE:Write the keywords of your blog separated by comma.

How To Configure Favicon:

Login to your blogger dashboard--> layout- -> Edit HTML.Now Scroll down to where you see below code :

<link href='YOUR-FAVICON-URL' rel='shortcut icon' type='image/vnd.microsoft.icon'/>

Now replace "YOUR-FAVICON-URL" with your Favicon address/url.


Configure Featured Content Slider:

Login to your blogger dashboard--> layout- -> Edit HTML.Find <!-- Featured Content Slider Started -->.

This is the code for the first slide:

<!-- Slide 1 Code Start -->
<div class='featured-post clearfix'>
<div class='slider-image'>
<img height='250' src='https://blogger.googleusercontent.com/img/b/R29vZ2xl/AVvXsEhjjyUCjDh5kr6Imp1uujWSHUrYDE9EY92CyHapV8dK_oU4ujTSNd_22HU6GGQuY0-6SQz4R2VgCd4t5DHqSM0SC4cjzyioB-ppSo1SJpdtLaA3wjpGrv31HG4xbEu5ZotT2iqNYNYzGqdD/s1600/1.jpg' width='400'/>
</div>
<div class='slider-post'>
<h2><a href='FEATURED-POST-LINK-1-HERE'>Featured Post 1 Title</a></h2>
<p>Replace these every slide sentences with your featured post descriptions.Go to Blogger edit html and find these sentences.Now replace these with your own descriptions.This theme is Bloggerized by Lasantha - Premiumbloggertemplates.com.Download more free blogger templates from www.premiumbloggertemplates.com.</p>
<a class='readmore' href='FEATURED-POST-LINK-1-HERE'><span>Read More</span></a>
</div>
</div>
<!-- Slide 1 Code End -->

Now replace,

"Featured Post 1 Title" with your featured post 1 title.
"FEATURED-POST-LINK-1-HERE" with your slide 1 link(2 times).
"Replace these every slide sentences with your featured post descriptions.Go to Blogger edit html and find these sentences.Now replace these with your own descriptions.This theme is Bloggerized by Lasantha - Premiumbloggertemplates.com.Download more free blogger templates from www.premiumbloggertemplates.com." with your slide 1 description.
"https://blogger.googleusercontent.com/img/b/R29vZ2xl/AVvXsEhjjyUCjDh5kr6Imp1uujWSHUrYDE9EY92CyHapV8dK_oU4ujTSNd_22HU6GGQuY0-6SQz4R2VgCd4t5DHqSM0SC4cjzyioB-ppSo1SJpdtLaA3wjpGrv31HG4xbEu5ZotT2iqNYNYzGqdD/s1600/1.jpg" with your slide 1 image address.

Now you have configured slide 1. Like this, you can configure next 4 slides.


How To Setup Subscription Box

Login to your blogger dashboard--> layout- -> Edit HTML.Now find "pbtemplates". You can find it several times.Replace these with your real Feedburner ID.

Replace "YOUR-TWITTER-USERNAME" with your real twitter username.
Replace "YOUR-FACEBOOK-URL" with your facebook profile or fan page url.


How To Configure Ad Banners

Find this and you can easily change this code as you like:
<!-- Banners Code Start -->

<div id='ads-block-125'>

<!-- Banner 1 Code -->
<a href='http://www.bluehost.com/track/pbt' rel='nofollow' target='_blank'><img src='https://blogger.googleusercontent.com/img/b/R29vZ2xl/AVvXsEjQoR7p2m_nPRbTrdi4iXCgT6lP6BDnKmMI-BFkWGRzOCs-hLH5nT7lsoQgL6tSMILbARywlRFOsXjlFtBPA6WQga_lmNBp5WTYyV9ikq7mXv20lmIyBpy7wthZfZlqI1seyvvOgi7Atk82/s1600/bh_125x125_02.gif'/></a>

<!-- Banner 2 Code -->
<a href='http://secure.hostgator.com/~affiliat/cgi-bin/affiliates/clickthru.cgi?id=lasantha' rel='nofollow' target='_blank'><img src='https://blogger.googleusercontent.com/img/b/R29vZ2xl/AVvXsEgUC211PyxgMZSHgZjEQZyrjOmXaocQw4vdzk5GlUDVPhlibuw7ylRE7pyQ7WzA8Dc67p12yf5bBgsVuSnJVt_2bCe2X2SGvsGCTEtr3lvJwE3eBI0nFOu3a20SCUm-t28aKpqB96P-oVhZ/s1600/125x125-2.gif'/></a>

<!-- Banner 3 Code -->
<a href='http://flexithemes.com/?partner=740' rel='nofollow' target='_blank'><img alt='Premium WordPress Themes' src='https://blogger.googleusercontent.com/img/b/R29vZ2xl/AVvXsEh3l9OuZFmbIkYo8MV0szkBOlGKnJKW8DjFs0BU9xgjfxGbo8cTTwkFyXx6r4ab9xVM3SE0Hs2CXj8t5emmGJqfgo5BBhlejiDtK3aosoMmjht5AXi4W4DdX0Dz1LMrDp3hbBBw73JfEsM/' style='border: 0;'/></a>

<!-- Banner 4 Code -->
<a href='http://secure.hostgator.com/~affiliat/cgi-bin/affiliates/clickthru.cgi?id=lasantha' rel='nofollow' target='_blank'><img src='https://blogger.googleusercontent.com/img/b/R29vZ2xl/AVvXsEjG078Cx3KNlAso0Y27IiNxq8QqGz96oBlVRNJTiAY95LdResDZf4RG-OTWeDfd4Rdu7dEqlX0SbgPolFqNeiZGSWrskmXKmFGCOVCAvYTXyIYL8pjlq1lwt5nrOeI1WiKbILBbcZdbCQ8O/s1600/125x125-animated-2.gif'/></a>

</div>
<div style='clear:both;'/>

<!-- Banners Code End -->
if you want to remove ad banners, simply remove above code.

How To Configure Navigation Menu

Find this:

<div class='clearfix' id='primary-nav'>
Now follow the configuration details here:

http://www.premiumbloggertemplates.com/2010/10/how-to-configure-navigation-menu.html


How To Add a Header Logo


You can add a header logo for this template easily in the "Page Elements" section(Blogger Default Method).Logo image size must be 325px width and 125px height.

If you have any problem regrading this template,leave a comment below.

Important !!!:

Please do not remove the footer credit. I spend several hours to create this blogger template. So that you can use it for your blog. All I ask is, stay the credit intact.

License:

This free Blogger template is licensed under the Creative Commons Attribution 3.0 License,which permits both personal and commercial use.
However, to satisfy the 'attribution' clause of the license, you are required to keep the footer links intact which provides due credit to its authors. For more specific details about the license, you may visit the URL below:
http://creativecommons.org/licenses/by/3.0/

Wednesday, December 15, 2010

Mahogany Blogger Template

Mahogany Blogger Template


Template name : Mahogany

Template type : 1 Sidebar, 2 Column, 4 Column footer, Adapted from Wordpress, Artworks, Brown, Featured Section, Fixed width, Header Banner, Left Sidebar, Magazine, Rounded corners, Slider, Top Navigation Bar, White

Release date : December 16, 2010

Coder/Designer Name(s) : Lasantha Bandara / CamelGraph

Coder/Designer URL(s) : http://www.premiumbloggertemplates.com/
http://camelgraph.com/

Basic Instructions : How to install a Blogger template

Advanced Details : http://www.premiumbloggertemplates.com/2010/12/mahogany-blogger-template.html


Configure Meta tags

Login to your blogger dashboard--> layout- -> Edit HTML.Now Scroll down to where you see below codes :

<meta content='DESCRIPTION HERE' name='description'/>
<meta content='KEYWORDS HERE' name='keywords'/>

Replace DESCRIPTION HERE,KEYWORDS HERE as below.

DESCRIPTION HERE:Write your blog description
KEYWORDS HERE:Write the keywords of your blog separated by comma.

How To Configure Favicon:

Login to your blogger dashboard--> layout- -> Edit HTML.Now Scroll down to where you see below code :

<link href='YOUR-FAVICON-URL' rel='shortcut icon' type='image/vnd.microsoft.icon'/>

Now replace "YOUR-FAVICON-URL" with your Favicon address/url.


Configure Featured Content Slider:

Login to your blogger dashboard--> layout- -> Edit HTML.Find <!-- Featured Content Slider Started -->.

This is the code for the first slide:

<!-- Slide 1 Code Start -->
<div class='featured-post clearfix'>
<div class='slider-image'>
<img height='250' src='https://blogger.googleusercontent.com/img/b/R29vZ2xl/AVvXsEhjjyUCjDh5kr6Imp1uujWSHUrYDE9EY92CyHapV8dK_oU4ujTSNd_22HU6GGQuY0-6SQz4R2VgCd4t5DHqSM0SC4cjzyioB-ppSo1SJpdtLaA3wjpGrv31HG4xbEu5ZotT2iqNYNYzGqdD/s1600/1.jpg' width='400'/>
</div>
<div class='slider-post'>
<h2><a href='FEATURED-POST-LINK-1-HERE'>Featured Post 1 Title</a></h2>
<p>Replace these every slide sentences with your featured post descriptions.Go to Blogger edit html and find these sentences.Now replace these with your own descriptions.This theme is Bloggerized by Lasantha - Premiumbloggertemplates.com.Download more free blogger templates from www.premiumbloggertemplates.com.</p>
<a class='readmore' href='FEATURED-POST-LINK-1-HERE'><span>Read More</span></a>
</div>
</div>
<!-- Slide 1 Code End -->

Now replace,

"Featured Post 1 Title" with your featured post 1 title.
"FEATURED-POST-LINK-1-HERE" with your slide 1 link(2 times).
"Replace these every slide sentences with your featured post descriptions.Go to Blogger edit html and find these sentences.Now replace these with your own descriptions.This theme is Bloggerized by Lasantha - Premiumbloggertemplates.com.Download more free blogger templates from www.premiumbloggertemplates.com." with your slide 1 description.
"https://blogger.googleusercontent.com/img/b/R29vZ2xl/AVvXsEhjjyUCjDh5kr6Imp1uujWSHUrYDE9EY92CyHapV8dK_oU4ujTSNd_22HU6GGQuY0-6SQz4R2VgCd4t5DHqSM0SC4cjzyioB-ppSo1SJpdtLaA3wjpGrv31HG4xbEu5ZotT2iqNYNYzGqdD/s1600/1.jpg" with your slide 1 image address.

Now you have configured slide 1. Like this, you can configure next 4 slides.


How To Setup Subscription Box

Login to your blogger dashboard--> layout- -> Edit HTML.Now find "pbtemplates". You can find it several times.Replace these with your real Feedburner ID.

Replace "YOUR-TWITTER-USERNAME" with your real twitter username.
Replace "YOUR-FACEBOOK-URL" with your facebook profile or fan page url.


How To Configure Ad Banners

Find this and you can easily change this code as you like:
<!-- Banners Code Start -->

<div id='ads-block-125'>

<!-- Banner 1 Code -->
<a href='http://www.bluehost.com/track/pbt' rel='nofollow' target='_blank'><img src='https://blogger.googleusercontent.com/img/b/R29vZ2xl/AVvXsEjQoR7p2m_nPRbTrdi4iXCgT6lP6BDnKmMI-BFkWGRzOCs-hLH5nT7lsoQgL6tSMILbARywlRFOsXjlFtBPA6WQga_lmNBp5WTYyV9ikq7mXv20lmIyBpy7wthZfZlqI1seyvvOgi7Atk82/s1600/bh_125x125_02.gif'/></a>

<!-- Banner 2 Code -->
<a href='http://secure.hostgator.com/~affiliat/cgi-bin/affiliates/clickthru.cgi?id=lasantha' rel='nofollow' target='_blank'><img src='https://blogger.googleusercontent.com/img/b/R29vZ2xl/AVvXsEgUC211PyxgMZSHgZjEQZyrjOmXaocQw4vdzk5GlUDVPhlibuw7ylRE7pyQ7WzA8Dc67p12yf5bBgsVuSnJVt_2bCe2X2SGvsGCTEtr3lvJwE3eBI0nFOu3a20SCUm-t28aKpqB96P-oVhZ/s1600/125x125-2.gif'/></a>

<!-- Banner 3 Code -->
<a href='http://flexithemes.com/?partner=740' rel='nofollow' target='_blank'><img alt='Premium WordPress Themes' src='https://blogger.googleusercontent.com/img/b/R29vZ2xl/AVvXsEh3l9OuZFmbIkYo8MV0szkBOlGKnJKW8DjFs0BU9xgjfxGbo8cTTwkFyXx6r4ab9xVM3SE0Hs2CXj8t5emmGJqfgo5BBhlejiDtK3aosoMmjht5AXi4W4DdX0Dz1LMrDp3hbBBw73JfEsM/' style='border: 0;'/></a>

<!-- Banner 4 Code -->
<a href='http://secure.hostgator.com/~affiliat/cgi-bin/affiliates/clickthru.cgi?id=lasantha' rel='nofollow' target='_blank'><img src='https://blogger.googleusercontent.com/img/b/R29vZ2xl/AVvXsEjG078Cx3KNlAso0Y27IiNxq8QqGz96oBlVRNJTiAY95LdResDZf4RG-OTWeDfd4Rdu7dEqlX0SbgPolFqNeiZGSWrskmXKmFGCOVCAvYTXyIYL8pjlq1lwt5nrOeI1WiKbILBbcZdbCQ8O/s1600/125x125-animated-2.gif'/></a>

</div>
<div style='clear:both;'/>

<!-- Banners Code End -->
if you want to remove ad banners, simply remove above code.

How To Configure Navigation Menu

Find this:

<div class='clearfix' id='primary-nav'>
Now follow the configuration details here:

http://www.premiumbloggertemplates.com/2010/10/how-to-configure-navigation-menu.html


How To Add a Header Logo


You can add a header logo for this template easily in the "Page Elements" section(Blogger Default Method).Logo image size must be 325px width and 125px height.

If you have any problem regrading this template,leave a comment below.

Important !!!:

Please do not remove the footer credit. I spend several hours to create this blogger template. So that you can use it for your blog. All I ask is, stay the credit intact.

License:

This free Blogger template is licensed under the Creative Commons Attribution 3.0 License,which permits both personal and commercial use.
However, to satisfy the 'attribution' clause of the license, you are required to keep the footer links intact which provides due credit to its authors. For more specific details about the license, you may visit the URL below:
http://creativecommons.org/licenses/by/3.0/

Monday, December 13, 2010

Azalea Blogger Template

Azalea Blogger Template


Template name : Azalea

Template type : 1 Sidebar, 2 Column, Adapted from Wordpress, 4 Column footer, Fixed width, Header Banner, Magazine, Right Sidebar, Rounded corners, Top Navigation Bar, Web 2.0, White

Release date : December 13, 2010

Coder/Designer Name(s) : Lasantha Bandara / CamelGraph

Coder/Designer URL(s) : http://www.premiumbloggertemplates.com/
http://camelgraph.com/

Basic Instructions : How to install a Blogger template

Advanced Details : http://www.premiumbloggertemplates.com/2010/12/azalea-blogger-template.html


Configure Meta tags

Login to your blogger dashboard--> layout- -> Edit HTML.Now Scroll down to where you see below codes :

<meta content='DESCRIPTION HERE' name='description'/>
<meta content='KEYWORDS HERE' name='keywords'/>

Replace DESCRIPTION HERE,KEYWORDS HERE as below.

DESCRIPTION HERE:Write your blog description
KEYWORDS HERE:Write the keywords of your blog separated by comma.

How To Configure Favicon:

Login to your blogger dashboard--> layout- -> Edit HTML.Now Scroll down to where you see below code :

<link href='YOUR-FAVICON-URL' rel='shortcut icon' type='image/vnd.microsoft.icon'/>

Now replace "YOUR-FAVICON-URL" with your Favicon address/url.


How To Setup Subscription Box

Login to your blogger dashboard--> layout- -> Edit HTML.Now find "pbtemplates". You can find it several times.Replace these with your real Feedburner ID.

Replace "YOUR-TWITTER-USERNAME" with your real twitter username.
Replace "YOUR-FACEBOOK-URL" with your facebook profile or fan page url.


How To Configure Ad Banners

Find this and you can easily change this code as you like:
<!-- Banners Code Start -->

<div id='ads-block-125'>

<!-- Banner 1 Code -->
<a href='http://www.bluehost.com/track/pbt' rel='nofollow' target='_blank'><img src='https://blogger.googleusercontent.com/img/b/R29vZ2xl/AVvXsEjQoR7p2m_nPRbTrdi4iXCgT6lP6BDnKmMI-BFkWGRzOCs-hLH5nT7lsoQgL6tSMILbARywlRFOsXjlFtBPA6WQga_lmNBp5WTYyV9ikq7mXv20lmIyBpy7wthZfZlqI1seyvvOgi7Atk82/s1600/bh_125x125_02.gif'/></a>

<!-- Banner 2 Code -->
<a href='http://secure.hostgator.com/~affiliat/cgi-bin/affiliates/clickthru.cgi?id=lasantha' rel='nofollow' target='_blank'><img src='https://blogger.googleusercontent.com/img/b/R29vZ2xl/AVvXsEgUC211PyxgMZSHgZjEQZyrjOmXaocQw4vdzk5GlUDVPhlibuw7ylRE7pyQ7WzA8Dc67p12yf5bBgsVuSnJVt_2bCe2X2SGvsGCTEtr3lvJwE3eBI0nFOu3a20SCUm-t28aKpqB96P-oVhZ/s1600/125x125-2.gif'/></a>

<!-- Banner 3 Code -->
<a href='http://flexithemes.com/?partner=740' rel='nofollow' target='_blank'><img alt='Premium WordPress Themes' src='https://blogger.googleusercontent.com/img/b/R29vZ2xl/AVvXsEh3l9OuZFmbIkYo8MV0szkBOlGKnJKW8DjFs0BU9xgjfxGbo8cTTwkFyXx6r4ab9xVM3SE0Hs2CXj8t5emmGJqfgo5BBhlejiDtK3aosoMmjht5AXi4W4DdX0Dz1LMrDp3hbBBw73JfEsM/' style='border: 0;'/></a>

<!-- Banner 4 Code -->
<a href='http://secure.hostgator.com/~affiliat/cgi-bin/affiliates/clickthru.cgi?id=lasantha' rel='nofollow' target='_blank'><img src='https://blogger.googleusercontent.com/img/b/R29vZ2xl/AVvXsEjG078Cx3KNlAso0Y27IiNxq8QqGz96oBlVRNJTiAY95LdResDZf4RG-OTWeDfd4Rdu7dEqlX0SbgPolFqNeiZGSWrskmXKmFGCOVCAvYTXyIYL8pjlq1lwt5nrOeI1WiKbILBbcZdbCQ8O/s1600/125x125-animated-2.gif'/></a>

</div>
<div style='clear:both;'/>

<!-- Banners Code End -->
if you want to remove ad banners, simply remove above code.

How To Configure Navigation Menu

Find this:

<div class='clearfix' id='primary-nav'>
Now follow the configuration details here:

http://www.premiumbloggertemplates.com/2010/10/how-to-configure-navigation-menu.html


How To Add a Header Logo

You can add a header logo for this template easily in the "Page Elements" section(Blogger Default Method).Logo image size must be 360px width and 125px height.

If you have any problem regrading this template,leave a comment below.

Important !!!:

Please do not remove the footer credit. I spend several hours to create this blogger template. So that you can use it for your blog. All I ask is, stay the credit intact.

License:

This free Blogger template is licensed under the Creative Commons Attribution 3.0 License,which permits both personal and commercial use.
However, to satisfy the 'attribution' clause of the license, you are required to keep the footer links intact which provides due credit to its authors. For more specific details about the license, you may visit the URL below:
http://creativecommons.org/licenses/by/3.0/

Sunday, December 12, 2010

Farrah Blogger Template

Farrah Blogger Template


Template name : Farrah

Template type : 1 Sidebar, 2 Column, 4 Column footer, Adapted from Wordpress, Brown, Fixed width, Header Banner, Magazine, Pink, Right Sidebar, Top Navigation Bar, Web 2.0, White

Release date : December 12, 2010

Coder/Designer Name(s) : Lasantha Bandara / CamelGraph

Coder/Designer URL(s) : http://www.premiumbloggertemplates.com/
http://camelgraph.com/

Basic Instructions : How to install a Blogger template

Advanced Details : http://www.premiumbloggertemplates.com/2010/12/farrah-blogger-template.html


Configure Meta tags

Login to your blogger dashboard--> layout- -> Edit HTML.Now Scroll down to where you see below codes :

<meta content='DESCRIPTION HERE' name='description'/>
<meta content='KEYWORDS HERE' name='keywords'/>

Replace DESCRIPTION HERE,KEYWORDS HERE as below.

DESCRIPTION HERE:Write your blog description
KEYWORDS HERE:Write the keywords of your blog separated by comma.

How To Configure Favicon:

Login to your blogger dashboard--> layout- -> Edit HTML.Now Scroll down to where you see below code :

<link href='YOUR-FAVICON-URL' rel='shortcut icon' type='image/vnd.microsoft.icon'/>

Now replace "YOUR-FAVICON-URL" with your Favicon address/url.


How To Setup Subscription Box

Login to your blogger dashboard--> layout- -> Edit HTML.Now find "pbtemplates". You can find it several times.Replace these with your real Feedburner ID.

Replace "YOUR-TWITTER-USERNAME" with your real twitter username.
Replace "YOUR-FACEBOOK-URL" with your facebook profile or fan page url.


How To Configure Ad Banners

Find this and you can easily change this code as you like:
<!-- Banners Code Start -->

<div id='ads-block-125'>

<!-- Banner 1 Code -->
<a href='http://www.bluehost.com/track/pbt' rel='nofollow' target='_blank'><img src='https://blogger.googleusercontent.com/img/b/R29vZ2xl/AVvXsEjQoR7p2m_nPRbTrdi4iXCgT6lP6BDnKmMI-BFkWGRzOCs-hLH5nT7lsoQgL6tSMILbARywlRFOsXjlFtBPA6WQga_lmNBp5WTYyV9ikq7mXv20lmIyBpy7wthZfZlqI1seyvvOgi7Atk82/s1600/bh_125x125_02.gif'/></a>

<!-- Banner 2 Code -->
<a href='http://secure.hostgator.com/~affiliat/cgi-bin/affiliates/clickthru.cgi?id=lasantha' rel='nofollow' target='_blank'><img src='https://blogger.googleusercontent.com/img/b/R29vZ2xl/AVvXsEgUC211PyxgMZSHgZjEQZyrjOmXaocQw4vdzk5GlUDVPhlibuw7ylRE7pyQ7WzA8Dc67p12yf5bBgsVuSnJVt_2bCe2X2SGvsGCTEtr3lvJwE3eBI0nFOu3a20SCUm-t28aKpqB96P-oVhZ/s1600/125x125-2.gif'/></a>

<!-- Banner 3 Code -->
<a href='http://flexithemes.com/?partner=740' rel='nofollow' target='_blank'><img alt='Premium WordPress Themes' src='https://blogger.googleusercontent.com/img/b/R29vZ2xl/AVvXsEh3l9OuZFmbIkYo8MV0szkBOlGKnJKW8DjFs0BU9xgjfxGbo8cTTwkFyXx6r4ab9xVM3SE0Hs2CXj8t5emmGJqfgo5BBhlejiDtK3aosoMmjht5AXi4W4DdX0Dz1LMrDp3hbBBw73JfEsM/' style='border: 0;'/></a>

<!-- Banner 4 Code -->
<a href='http://secure.hostgator.com/~affiliat/cgi-bin/affiliates/clickthru.cgi?id=lasantha' rel='nofollow' target='_blank'><img src='https://blogger.googleusercontent.com/img/b/R29vZ2xl/AVvXsEjG078Cx3KNlAso0Y27IiNxq8QqGz96oBlVRNJTiAY95LdResDZf4RG-OTWeDfd4Rdu7dEqlX0SbgPolFqNeiZGSWrskmXKmFGCOVCAvYTXyIYL8pjlq1lwt5nrOeI1WiKbILBbcZdbCQ8O/s1600/125x125-animated-2.gif'/></a>

</div>
<div style='clear:both;'/>

<!-- Banners Code End -->
if you want to remove ad banners, simply remove above code.

How To Configure Navigation Menu

Find this:

<div class='clearfix' id='primary-nav'>
Now follow the configuration details here:

http://www.premiumbloggertemplates.com/2010/10/how-to-configure-navigation-menu.html


How To Add a Header Logo

You can add a header logo for this template easily in the "Page Elements" section(Blogger Default Method).Logo image size must be 325px width and 125px height.

If you have any problem regrading this template,leave a comment below.

Important !!!:

Please do not remove the footer credit. I spend several hours to create this blogger template. So that you can use it for your blog. All I ask is, stay the credit intact.

License:

This free Blogger template is licensed under the Creative Commons Attribution 3.0 License,which permits both personal and commercial use.
However, to satisfy the 'attribution' clause of the license, you are required to keep the footer links intact which provides due credit to its authors. For more specific details about the license, you may visit the URL below:
http://creativecommons.org/licenses/by/3.0/

Saturday, December 11, 2010

Artarius Blogger Template

Artarius Blogger Template


Template name : Artarius

Template type : 1 Sidebar, 2 Column, 4 Column footer, Adapted from Wordpress, Elegant, Fixed width, Gradients, Grey, Magazine, Right Sidebar, Top Navigation Bar, Web 2.0, White

Release date : December 11, 2010

Coder/Designer Name(s) : Lasantha Bandara / Free Wordpress Themes

Coder/Designer URL(s) : http://www.premiumbloggertemplates.com/
http://www.freewordpressthemes.ws/

Basic Instructions : How to install a Blogger template

Advanced Details : http://www.premiumbloggertemplates.com/2010/12/artarius-blogger-template.html


Configure Meta tags

Login to your blogger dashboard--> layout- -> Edit HTML.Now Scroll down to where you see below codes :

<meta content='DESCRIPTION HERE' name='description'/>
<meta content='KEYWORDS HERE' name='keywords'/>

Replace DESCRIPTION HERE,KEYWORDS HERE as below.

DESCRIPTION HERE:Write your blog description
KEYWORDS HERE:Write the keywords of your blog separated by comma.

How To Configure Favicon:

Login to your blogger dashboard--> layout- -> Edit HTML.Now Scroll down to where you see below code :

<link href='YOUR-FAVICON-URL' rel='shortcut icon' type='image/vnd.microsoft.icon'/>

Now replace "YOUR-FAVICON-URL" with your Favicon address/url.


How To Setup Subscription Box

Login to your blogger dashboard--> layout- -> Edit HTML.Now find "pbtemplates". You can find it several times.Replace these with your real Feedburner ID.

Replace "YOUR-TWITTER-USERNAME" with your real twitter username.
Replace "YOUR-FACEBOOK-URL" with your facebook profile or fan page url.


How To Configure Ad Banners

Find this and you can easily change this code as you like:
<!-- Banners Code Start -->

<div id='ads-block-125'>

<!-- Banner 1 Code -->
<a href='http://www.bluehost.com/track/pbt' rel='nofollow' target='_blank'><img src='https://blogger.googleusercontent.com/img/b/R29vZ2xl/AVvXsEjQoR7p2m_nPRbTrdi4iXCgT6lP6BDnKmMI-BFkWGRzOCs-hLH5nT7lsoQgL6tSMILbARywlRFOsXjlFtBPA6WQga_lmNBp5WTYyV9ikq7mXv20lmIyBpy7wthZfZlqI1seyvvOgi7Atk82/s1600/bh_125x125_02.gif'/></a>

<!-- Banner 2 Code -->
<a href='http://secure.hostgator.com/~affiliat/cgi-bin/affiliates/clickthru.cgi?id=lasantha' rel='nofollow' target='_blank'><img src='https://blogger.googleusercontent.com/img/b/R29vZ2xl/AVvXsEgUC211PyxgMZSHgZjEQZyrjOmXaocQw4vdzk5GlUDVPhlibuw7ylRE7pyQ7WzA8Dc67p12yf5bBgsVuSnJVt_2bCe2X2SGvsGCTEtr3lvJwE3eBI0nFOu3a20SCUm-t28aKpqB96P-oVhZ/s1600/125x125-2.gif'/></a>

<!-- Banner 3 Code -->
<a href='http://flexithemes.com/?partner=740' rel='nofollow' target='_blank'><img alt='Premium WordPress Themes' src='https://blogger.googleusercontent.com/img/b/R29vZ2xl/AVvXsEh3l9OuZFmbIkYo8MV0szkBOlGKnJKW8DjFs0BU9xgjfxGbo8cTTwkFyXx6r4ab9xVM3SE0Hs2CXj8t5emmGJqfgo5BBhlejiDtK3aosoMmjht5AXi4W4DdX0Dz1LMrDp3hbBBw73JfEsM/' style='border: 0;'/></a>

<!-- Banner 4 Code -->
<a href='http://secure.hostgator.com/~affiliat/cgi-bin/affiliates/clickthru.cgi?id=lasantha' rel='nofollow' target='_blank'><img src='https://blogger.googleusercontent.com/img/b/R29vZ2xl/AVvXsEjG078Cx3KNlAso0Y27IiNxq8QqGz96oBlVRNJTiAY95LdResDZf4RG-OTWeDfd4Rdu7dEqlX0SbgPolFqNeiZGSWrskmXKmFGCOVCAvYTXyIYL8pjlq1lwt5nrOeI1WiKbILBbcZdbCQ8O/s1600/125x125-animated-2.gif'/></a>

</div>
<div style='clear:both;'/>

<!-- Banners Code End -->
if you want to remove ad banners, simply remove above code.

How To Configure Navigation Menu

Find this:

<div class='clearfix' id='primary-nav'>
Now follow the configuration details here:

http://www.premiumbloggertemplates.com/2010/10/how-to-configure-navigation-menu.html


How To Add a Header Logo

You can add a header logo for this template easily in the "Page Elements" section(Blogger Default Method).Logo image size must be 450px width and 125px height.

If you have any problem regrading this template,leave a comment below.

Important !!!:

Please do not remove the footer credit. I spend several hours to create this blogger template. So that you can use it for your blog. All I ask is, stay the credit intact.

License:

This free Blogger template is licensed under the Creative Commons Attribution 3.0 License,which permits both personal and commercial use.
However, to satisfy the 'attribution' clause of the license, you are required to keep the footer links intact which provides due credit to its authors. For more specific details about the license, you may visit the URL below:
http://creativecommons.org/licenses/by/3.0/

Thursday, December 9, 2010

Alessa Blogger Template

Alessa Blogger Template


Template name : Alessa

Template type : 1 Sidebar, 2 Column, 4 Column footer, Adapted from Wordpress, Blue, Elegant, Fixed width, Header Banner, Magazine, Right Sidebar, Shadow, Top Navigation Bar, Web 2.0

Release date : December 9, 2010

Coder/Designer Name(s) : Lasantha Bandara / CamelGraph

Coder/Designer URL(s) : http://www.premiumbloggertemplates.com/
http://camelgraph.com/

Basic Instructions : How to install a Blogger template

Advanced Details : http://www.premiumbloggertemplates.com/2010/12/alessa-premium-blogger-template.html


Configure Meta tags

Login to your blogger dashboard--> layout- -> Edit HTML.Now Scroll down to where you see below codes :

<meta content='DESCRIPTION HERE' name='description'/>
<meta content='KEYWORDS HERE' name='keywords'/>

Replace DESCRIPTION HERE,KEYWORDS HERE as below.

DESCRIPTION HERE:Write your blog description
KEYWORDS HERE:Write the keywords of your blog separated by comma.

How To Configure Favicon:

Login to your blogger dashboard--> layout- -> Edit HTML.Now Scroll down to where you see below code :

<link href='YOUR-FAVICON-URL' rel='shortcut icon' type='image/vnd.microsoft.icon'/>

Now replace "YOUR-FAVICON-URL" with your Favicon address/url.


How To Setup Subscription Box

Login to your blogger dashboard--> layout- -> Edit HTML.Now find "pbtemplates". You can find it several times.Replace these with your real Feedburner ID.

Replace "YOUR-TWITTER-USERNAME" with your real twitter username.
Replace "YOUR-FACEBOOK-URL" with your facebook profile or fan page url.


How To Configure Ad Banners

Find this and you can easily change this code as you like:
<!-- Banners Code Start -->

<div id='ads-block-125'>

<!-- Banner 1 Code -->
<a href='http://www.bluehost.com/track/pbt' rel='nofollow' target='_blank'><img src='https://blogger.googleusercontent.com/img/b/R29vZ2xl/AVvXsEjQoR7p2m_nPRbTrdi4iXCgT6lP6BDnKmMI-BFkWGRzOCs-hLH5nT7lsoQgL6tSMILbARywlRFOsXjlFtBPA6WQga_lmNBp5WTYyV9ikq7mXv20lmIyBpy7wthZfZlqI1seyvvOgi7Atk82/s1600/bh_125x125_02.gif'/></a>

<!-- Banner 2 Code -->
<a href='http://secure.hostgator.com/~affiliat/cgi-bin/affiliates/clickthru.cgi?id=lasantha' rel='nofollow' target='_blank'><img src='https://blogger.googleusercontent.com/img/b/R29vZ2xl/AVvXsEgUC211PyxgMZSHgZjEQZyrjOmXaocQw4vdzk5GlUDVPhlibuw7ylRE7pyQ7WzA8Dc67p12yf5bBgsVuSnJVt_2bCe2X2SGvsGCTEtr3lvJwE3eBI0nFOu3a20SCUm-t28aKpqB96P-oVhZ/s1600/125x125-2.gif'/></a>

<!-- Banner 3 Code -->
<a href='http://flexithemes.com/?partner=740' rel='nofollow' target='_blank'><img alt='Premium WordPress Themes' src='https://blogger.googleusercontent.com/img/b/R29vZ2xl/AVvXsEh3l9OuZFmbIkYo8MV0szkBOlGKnJKW8DjFs0BU9xgjfxGbo8cTTwkFyXx6r4ab9xVM3SE0Hs2CXj8t5emmGJqfgo5BBhlejiDtK3aosoMmjht5AXi4W4DdX0Dz1LMrDp3hbBBw73JfEsM/' style='border: 0;'/></a>

<!-- Banner 4 Code -->
<a href='http://secure.hostgator.com/~affiliat/cgi-bin/affiliates/clickthru.cgi?id=lasantha' rel='nofollow' target='_blank'><img src='https://blogger.googleusercontent.com/img/b/R29vZ2xl/AVvXsEjG078Cx3KNlAso0Y27IiNxq8QqGz96oBlVRNJTiAY95LdResDZf4RG-OTWeDfd4Rdu7dEqlX0SbgPolFqNeiZGSWrskmXKmFGCOVCAvYTXyIYL8pjlq1lwt5nrOeI1WiKbILBbcZdbCQ8O/s1600/125x125-animated-2.gif'/></a>

</div>
<div style='clear:both;'/>

<!-- Banners Code End -->
if you want to remove ad banners, simply remove above code.

How To Configure Navigation Menu

Find this:

<div class='clearfix' id='primary-nav'>
Now follow the configuration details here:

http://www.premiumbloggertemplates.com/2010/10/how-to-configure-navigation-menu.html


How To Add a Header Logo

You can add a header logo for this template easily in the "Page Elements" section(Blogger Default Method).Logo image size must be 325px width and 125px height.

If you have any problem regrading this template,leave a comment below.

Important !!!:

Please do not remove the footer credit. I spend several hours to create this blogger template. So that you can use it for your blog. All I ask is, stay the credit intact.

License:

This free Blogger template is licensed under the Creative Commons Attribution 3.0 License,which permits both personal and commercial use.
However, to satisfy the 'attribution' clause of the license, you are required to keep the footer links intact which provides due credit to its authors. For more specific details about the license, you may visit the URL below:
http://creativecommons.org/licenses/by/3.0/

Wednesday, December 8, 2010

Comunale Blogger Template

Comunale Blogger Template


Template name : Comunale

Template type : 1 Sidebar, 2 Column, 4 Column footer, Adapted from Wordpress, Blue, Elegant, Fixed width, Header Banner, Magazine, Pbtemplates, Right Sidebar, Top Navigation Bar, Web 2.0

Release date : December 9, 2010

Coder/Designer Name(s) : Lasantha Bandara / Free Wordpress Themes

Coder/Designer URL(s) : http://www.premiumbloggertemplates.com/
http://www.freewordpressthemes.ws/

Basic Instructions : How to install a Blogger template

Advanced Details : http://www.premiumbloggertemplates.com/2010/12/comunale-blogger-template.html


Configure Meta tags

Login to your blogger dashboard--> layout- -> Edit HTML.Now Scroll down to where you see below codes :

<meta content='DESCRIPTION HERE' name='description'/>
<meta content='KEYWORDS HERE' name='keywords'/>

Replace DESCRIPTION HERE,KEYWORDS HERE as below.

DESCRIPTION HERE:Write your blog description
KEYWORDS HERE:Write the keywords of your blog separated by comma.

How To Configure Favicon:

Login to your blogger dashboard--> layout- -> Edit HTML.Now Scroll down to where you see below code :

<link href='YOUR-FAVICON-URL' rel='shortcut icon' type='image/vnd.microsoft.icon'/>

Now replace "YOUR-FAVICON-URL" with your Favicon address/url.


How To Setup Subscription Box

Login to your blogger dashboard--> layout- -> Edit HTML.Now find "pbtemplates". You can find it several times.Replace these with your real Feedburner ID.

Replace "YOUR-TWITTER-USERNAME" with your real twitter username.
Replace "YOUR-FACEBOOK-URL" with your facebook profile or fan page url.


How To Configure Ad Banners

Find this and you can easily change this code as you like:
<!-- Banners Code Start -->

<div id='ads-block-125'>

<!-- Banner 1 Code -->
<a href='http://www.bluehost.com/track/pbt' rel='nofollow' target='_blank'><img src='https://blogger.googleusercontent.com/img/b/R29vZ2xl/AVvXsEjQoR7p2m_nPRbTrdi4iXCgT6lP6BDnKmMI-BFkWGRzOCs-hLH5nT7lsoQgL6tSMILbARywlRFOsXjlFtBPA6WQga_lmNBp5WTYyV9ikq7mXv20lmIyBpy7wthZfZlqI1seyvvOgi7Atk82/s1600/bh_125x125_02.gif'/></a>

<!-- Banner 2 Code -->
<a href='http://secure.hostgator.com/~affiliat/cgi-bin/affiliates/clickthru.cgi?id=lasantha' rel='nofollow' target='_blank'><img src='https://blogger.googleusercontent.com/img/b/R29vZ2xl/AVvXsEgUC211PyxgMZSHgZjEQZyrjOmXaocQw4vdzk5GlUDVPhlibuw7ylRE7pyQ7WzA8Dc67p12yf5bBgsVuSnJVt_2bCe2X2SGvsGCTEtr3lvJwE3eBI0nFOu3a20SCUm-t28aKpqB96P-oVhZ/s1600/125x125-2.gif'/></a>

<!-- Banner 3 Code -->
<a href='http://flexithemes.com/?partner=740' rel='nofollow' target='_blank'><img alt='Premium WordPress Themes' src='https://blogger.googleusercontent.com/img/b/R29vZ2xl/AVvXsEh3l9OuZFmbIkYo8MV0szkBOlGKnJKW8DjFs0BU9xgjfxGbo8cTTwkFyXx6r4ab9xVM3SE0Hs2CXj8t5emmGJqfgo5BBhlejiDtK3aosoMmjht5AXi4W4DdX0Dz1LMrDp3hbBBw73JfEsM/' style='border: 0;'/></a>

<!-- Banner 4 Code -->
<a href='http://secure.hostgator.com/~affiliat/cgi-bin/affiliates/clickthru.cgi?id=lasantha' rel='nofollow' target='_blank'><img src='https://blogger.googleusercontent.com/img/b/R29vZ2xl/AVvXsEjG078Cx3KNlAso0Y27IiNxq8QqGz96oBlVRNJTiAY95LdResDZf4RG-OTWeDfd4Rdu7dEqlX0SbgPolFqNeiZGSWrskmXKmFGCOVCAvYTXyIYL8pjlq1lwt5nrOeI1WiKbILBbcZdbCQ8O/s1600/125x125-animated-2.gif'/></a>

</div>
<div style='clear:both;'/>

<!-- Banners Code End -->
if you want to remove ad banners, simply remove above code.

How To Configure Navigation Menu

Find this:

<div class='clearfix' id='primary-nav'>
Now follow the configuration details here:

http://www.premiumbloggertemplates.com/2010/10/how-to-configure-navigation-menu.html


How To Add a Header Logo

You can add a header logo for this template easily in the "Page Elements" section(Blogger Default Method).Logo image size must be 450px width and 125px height.

If you have any problem regrading this template,leave a comment below.

Important !!!:

Please do not remove the footer credit. I spend several hours to create this blogger template. So that you can use it for your blog. All I ask is, stay the credit intact.

License:

This free Blogger template is licensed under the Creative Commons Attribution 3.0 License,which permits both personal and commercial use.
However, to satisfy the 'attribution' clause of the license, you are required to keep the footer links intact which provides due credit to its authors. For more specific details about the license, you may visit the URL below:
http://creativecommons.org/licenses/by/3.0/

Tuesday, December 7, 2010

Madalyn Blogger Template

Madalyn Blogger Template


Template name : Madalyn

Template type : 1 Sidebar, 2 Column, 4 Column footer, Adapted from Wordpress, Artworks, Elegant, Fixed width, Grey, Header Banner, Magazine, Right Sidebar, Top Navigation Bar, Web 2.0, White

Release date : December 7, 2010

Coder/Designer Name(s) : Lasantha Bandara / CamelGraph

Coder/Designer URL(s) : http://www.premiumbloggertemplates.com/
http://camelgraph.com/

Basic Instructions : How to install a Blogger template

Advanced Details : http://www.premiumbloggertemplates.com/2010/12/madalyn-premium-blogger-template.html


Configure Meta tags

Login to your blogger dashboard--> layout- -> Edit HTML.Now Scroll down to where you see below codes :

<meta content='DESCRIPTION HERE' name='description'/>
<meta content='KEYWORDS HERE' name='keywords'/>

Replace DESCRIPTION HERE,KEYWORDS HERE as below.

DESCRIPTION HERE:Write your blog description
KEYWORDS HERE:Write the keywords of your blog separated by comma.

How To Configure Favicon:

Login to your blogger dashboard--> layout- -> Edit HTML.Now Scroll down to where you see below code :

<link href='YOUR-FAVICON-URL' rel='shortcut icon' type='image/vnd.microsoft.icon'/>

Now replace "YOUR-FAVICON-URL" with your Favicon address/url.


How To Setup Subscription Box

Login to your blogger dashboard--> layout- -> Edit HTML.Now find "pbtemplates". You can find it several times.Replace these with your real Feedburner ID.

Replace "YOUR-TWITTER-USERNAME" with your real twitter username.
Replace "YOUR-FACEBOOK-URL" with your facebook profile or fan page url.


How To Configure Ad Banners

Find this and you can easily change this code as you like:
<!-- Banners Code Start -->

<div id='ads-block-125'>

<!-- Banner 1 Code -->
<a href='http://www.bluehost.com/track/pbt' rel='nofollow' target='_blank'><img src='https://blogger.googleusercontent.com/img/b/R29vZ2xl/AVvXsEjQoR7p2m_nPRbTrdi4iXCgT6lP6BDnKmMI-BFkWGRzOCs-hLH5nT7lsoQgL6tSMILbARywlRFOsXjlFtBPA6WQga_lmNBp5WTYyV9ikq7mXv20lmIyBpy7wthZfZlqI1seyvvOgi7Atk82/s1600/bh_125x125_02.gif'/></a>

<!-- Banner 2 Code -->
<a href='http://secure.hostgator.com/~affiliat/cgi-bin/affiliates/clickthru.cgi?id=lasantha' rel='nofollow' target='_blank'><img src='https://blogger.googleusercontent.com/img/b/R29vZ2xl/AVvXsEgUC211PyxgMZSHgZjEQZyrjOmXaocQw4vdzk5GlUDVPhlibuw7ylRE7pyQ7WzA8Dc67p12yf5bBgsVuSnJVt_2bCe2X2SGvsGCTEtr3lvJwE3eBI0nFOu3a20SCUm-t28aKpqB96P-oVhZ/s1600/125x125-2.gif'/></a>

<!-- Banner 3 Code -->
<a href='http://flexithemes.com/?partner=740' rel='nofollow' target='_blank'><img alt='Premium WordPress Themes' src='https://blogger.googleusercontent.com/img/b/R29vZ2xl/AVvXsEh3l9OuZFmbIkYo8MV0szkBOlGKnJKW8DjFs0BU9xgjfxGbo8cTTwkFyXx6r4ab9xVM3SE0Hs2CXj8t5emmGJqfgo5BBhlejiDtK3aosoMmjht5AXi4W4DdX0Dz1LMrDp3hbBBw73JfEsM/' style='border: 0;'/></a>

<!-- Banner 4 Code -->
<a href='http://secure.hostgator.com/~affiliat/cgi-bin/affiliates/clickthru.cgi?id=lasantha' rel='nofollow' target='_blank'><img src='https://blogger.googleusercontent.com/img/b/R29vZ2xl/AVvXsEjG078Cx3KNlAso0Y27IiNxq8QqGz96oBlVRNJTiAY95LdResDZf4RG-OTWeDfd4Rdu7dEqlX0SbgPolFqNeiZGSWrskmXKmFGCOVCAvYTXyIYL8pjlq1lwt5nrOeI1WiKbILBbcZdbCQ8O/s1600/125x125-animated-2.gif'/></a>

</div>
<div style='clear:both;'/>

<!-- Banners Code End -->
if you want to remove ad banners, simply remove above code.

How To Configure Navigation Menu

Find this:

<div class='clearfix' id='primary-nav'>
Now follow the configuration details here:

http://www.premiumbloggertemplates.com/2010/10/how-to-configure-navigation-menu.html


How To Add a Header Logo

You can add a header logo for this template easily in the "Page Elements" section(Blogger Default Method).Logo image size must be 450px width and 125px height.

If you have any problem regrading this template,leave a comment below.

Important !!!:

Please do not remove the footer credit. I spend several hours to create this blogger template. So that you can use it for your blog. All I ask is, stay the credit intact.

License:

This free Blogger template is licensed under the Creative Commons Attribution 3.0 License,which permits both personal and commercial use.
However, to satisfy the 'attribution' clause of the license, you are required to keep the footer links intact which provides due credit to its authors. For more specific details about the license, you may visit the URL below:
http://creativecommons.org/licenses/by/3.0/

Monday, December 6, 2010

Hartle Suede Blogger Template

Hartle Suede Blogger Template


Template name : Hartle Suede

Template type : 1 Sidebar, 2 Column, 4 Column footer, Adapted from Wordpress, Brown, Featured Section, Fixed width, Header Banner, Left Sidebar, Magazine, Premium, Slider, Top Navigation Bar, Web 2.0

Release date : December 7, 2010

Coder/Designer Name(s) : Lasantha Bandara / CamelGraph

Coder/Designer URL(s) : http://www.premiumbloggertemplates.com/
http://camelgraph.com/

Basic Instructions : How to install a Blogger template

Advanced Details : http://www.premiumbloggertemplates.com/2010/12/hartle-suede-premium-blogger-template.html


Configure Meta tags

Login to your blogger dashboard--> layout- -> Edit HTML.Now Scroll down to where you see below codes :

<meta content='DESCRIPTION HERE' name='description'/>
<meta content='KEYWORDS HERE' name='keywords'/>

Replace DESCRIPTION HERE,KEYWORDS HERE as below.

DESCRIPTION HERE:Write your blog description
KEYWORDS HERE:Write the keywords of your blog separated by comma.

How To Configure Favicon:

Login to your blogger dashboard--> layout- -> Edit HTML.Now Scroll down to where you see below code :

<link href='YOUR-FAVICON-URL' rel='shortcut icon' type='image/vnd.microsoft.icon'/>

Now replace "YOUR-FAVICON-URL" with your Favicon address/url.


Configure Featured Content Slider:

Login to your blogger dashboard--> layout- -> Edit HTML.Find <!-- Featured Content Slider Started -->.

This is the code for the first slide:

<!-- Slide 1 Code Start --> 
<div class='featured-post clearfix'>
<div class='slider-image'>
<img height='250' src='https://blogger.googleusercontent.com/img/b/R29vZ2xl/AVvXsEjPtJMZ-udsp1LjyV-I60z6KP_WY7F6_65bCd9XhaQC-V5EGP_WPFAjH_rvqWrL6BXrmO2bQ7vw2f2rux0OZPmEOCFGPAIMVjRUd_oNan5li2Cl_nKoaXtLB-tFLTJIBfMsUzO0QkS3N9ef/s1600/1.jpg' width='400'/>
</div>
<div class='slider-post'>
<h2><a href='FEATURED-POST-LINK-1-HERE'>Featured Post 1 Title</a></h2>
<p>Replace these every slide sentences with your featured post descriptions.Go to Blogger edit html and find these sentences.Now replace these with your own descriptions.This theme is Bloggerized by Lasantha - Premiumbloggertemplates.com.Download more free blogger templates from www.premiumbloggertemplates.com.</p>
<a class='readmore' href='FEATURED-POST-LINK-1-HERE'><span>Read More</span></a>
</div>
</div>
<!-- Slide 1 Code End -->

Now replace,

"Featured Post 1 Title" with your featured post 1 title.
"FEATURED-POST-LINK-1-HERE" with your slide 1 link(2 times).
"Replace these every slide sentences with your featured post descriptions.Go to Blogger edit html and find these sentences.Now replace these with your own descriptions.This theme is Bloggerized by Lasantha - Premiumbloggertemplates.com.Download more free blogger templates from www.premiumbloggertemplates.com." with your slide 1 description.
"https://blogger.googleusercontent.com/img/b/R29vZ2xl/AVvXsEjPtJMZ-udsp1LjyV-I60z6KP_WY7F6_65bCd9XhaQC-V5EGP_WPFAjH_rvqWrL6BXrmO2bQ7vw2f2rux0OZPmEOCFGPAIMVjRUd_oNan5li2Cl_nKoaXtLB-tFLTJIBfMsUzO0QkS3N9ef/s1600/1.jpg" with your slide 1 image address.

Now you have configured slide 1. Like this, you can configure next 4 slides.


How To Setup Subscription Box

Login to your blogger dashboard--> layout- -> Edit HTML.Now find "pbtemplates". You can find it several times.Replace these with your real Feedburner ID.

Replace "YOUR-TWITTER-USERNAME" with your real twitter username.
Replace "YOUR-FACEBOOK-URL" with your facebook profile or fan page url.


How To Configure Ad Banners

Find this and you can easily change this code as you like:
<!-- Banners Code Start -->

<div id='ads-block-125'>

<!-- Banner 1 Code -->
<a href='http://www.bluehost.com/track/pbt' rel='nofollow' target='_blank'><img src='https://blogger.googleusercontent.com/img/b/R29vZ2xl/AVvXsEjQoR7p2m_nPRbTrdi4iXCgT6lP6BDnKmMI-BFkWGRzOCs-hLH5nT7lsoQgL6tSMILbARywlRFOsXjlFtBPA6WQga_lmNBp5WTYyV9ikq7mXv20lmIyBpy7wthZfZlqI1seyvvOgi7Atk82/s1600/bh_125x125_02.gif'/></a>

<!-- Banner 2 Code -->
<a href='http://secure.hostgator.com/~affiliat/cgi-bin/affiliates/clickthru.cgi?id=lasantha' rel='nofollow' target='_blank'><img src='https://blogger.googleusercontent.com/img/b/R29vZ2xl/AVvXsEgUC211PyxgMZSHgZjEQZyrjOmXaocQw4vdzk5GlUDVPhlibuw7ylRE7pyQ7WzA8Dc67p12yf5bBgsVuSnJVt_2bCe2X2SGvsGCTEtr3lvJwE3eBI0nFOu3a20SCUm-t28aKpqB96P-oVhZ/s1600/125x125-2.gif'/></a>

<!-- Banner 3 Code -->
<a href='http://flexithemes.com/?partner=740' rel='nofollow' target='_blank'><img alt='Premium WordPress Themes' src='https://blogger.googleusercontent.com/img/b/R29vZ2xl/AVvXsEh3l9OuZFmbIkYo8MV0szkBOlGKnJKW8DjFs0BU9xgjfxGbo8cTTwkFyXx6r4ab9xVM3SE0Hs2CXj8t5emmGJqfgo5BBhlejiDtK3aosoMmjht5AXi4W4DdX0Dz1LMrDp3hbBBw73JfEsM/' style='border: 0;'/></a>

<!-- Banner 4 Code -->
<a href='http://secure.hostgator.com/~affiliat/cgi-bin/affiliates/clickthru.cgi?id=lasantha' rel='nofollow' target='_blank'><img src='https://blogger.googleusercontent.com/img/b/R29vZ2xl/AVvXsEjG078Cx3KNlAso0Y27IiNxq8QqGz96oBlVRNJTiAY95LdResDZf4RG-OTWeDfd4Rdu7dEqlX0SbgPolFqNeiZGSWrskmXKmFGCOVCAvYTXyIYL8pjlq1lwt5nrOeI1WiKbILBbcZdbCQ8O/s1600/125x125-animated-2.gif'/></a>

</div>
<div style='clear:both;'/>

<!-- Banners Code End -->
if you want to remove ad banners, simply remove above code.

How To Configure Navigation Menu

Find this:

<div class='clearfix' id='primary-nav'>
Now follow the configuration details here:

http://www.premiumbloggertemplates.com/2010/10/how-to-configure-navigation-menu.html


How To Add a Header Logo


You can add a header logo for this template easily in the "Page Elements" section(Blogger Default Method).Logo image size must be 360px width and 125px height.

If you have any problem regrading this template,leave a comment below.

Important !!!:

Please do not remove the footer credit. I spend several hours to create this blogger template. So that you can use it for your blog. All I ask is, stay the credit intact.

License:

This free Blogger template is licensed under the Creative Commons Attribution 3.0 License,which permits both personal and commercial use.
However, to satisfy the 'attribution' clause of the license, you are required to keep the footer links intact which provides due credit to its authors. For more specific details about the license, you may visit the URL below:
http://creativecommons.org/licenses/by/3.0/

Friday, November 19, 2010

Drakon Blogger Template

Drakon Blogger Template


Template name : Drakon

Template type : 1 Sidebar, 2 Column, 4 Column footer, Adapted from Wordpress, Featured Section, Fixed width, Header Banner, Magazine, Premium, Right Sidebar, Slider, Top Navigation Bar, White, Orange

Release date : November 19, 2010

Coder/Designer Name(s) : Lasantha Bandara / Web2feel

Coder/Designer URL(s) : http://www.premiumbloggertemplates.com/
http://www.web2feel.com/

Basic Instructions : How to install a Blogger template

Advanced Details : http://www.premiumbloggertemplates.com/2010/11/drakon-premium-blogger-template.html


Configure Meta tags

Login to your blogger dashboard--> layout- -> Edit HTML.Now Scroll down to where you see below codes :

<meta content='DESCRIPTION HERE' name='description'/>
<meta content='KEYWORDS HERE' name='keywords'/>

Replace DESCRIPTION HERE,KEYWORDS HERE as below.

DESCRIPTION HERE:Write your blog description
KEYWORDS HERE:Write the keywords of your blog separated by comma.

How To Configure Favicon:

Login to your blogger dashboard--> layout- -> Edit HTML.Now Scroll down to where you see below code :

<link href='YOUR-FAVICON-URL' rel='shortcut icon' type='image/vnd.microsoft.icon'/>

Now replace "YOUR-FAVICON-URL" with your Favicon address/url.


Configure Featured Content Slider

There is 5 featured slides in this slider.Login to your blogger dashboard--> layout- -> Edit HTML. Find below code.

This is the code for the first slide:

<li>
<div class='mytext'>
<a href='SLIDE-1-LINK-HERE'>
<img class='sidim' src='https://blogger.googleusercontent.com/img/b/R29vZ2xl/AVvXsEg5mpmigRPwLBoxhAr0EWOLp0HX6SFm-oAnzSL3jXlqHSYKcS-dUqOR4LO0kTs640JtIgJgPW9E_WCo22PPPb9Wb9HaXNBeADvKyD8ZDjPy6zLWU2Rzo7SzaJgZEMWokDUHzed9sdW_a8E/s1600/1.jpeg'/>
</a>
<div class='clear'/>
<h2><a href='SLIDE-1-LINK-HERE'>Slide 1 Title</a></h2>
<p>Go to Blogger edit html and replace these slide 1 description with your own words. ...</p>
</div>
</li>


  • Replace "Slide 1 Title" with your first slide title.
  • Replace "Go to Blogger edit html and replace these slide 1 description with your own words. ..." with your own description.
  • Replace "SLIDE-1-LINK-HERE" with your slide link(where to go when click on this slide).
  • Replace "https://blogger.googleusercontent.com/img/b/R29vZ2xl/AVvXsEhCXZH8sriva8NknVkgY55_DD1iw17Jyd00IupaYxpMAMrSA_dvlGjh0r95EWsOwSF8jkHF2vB88IcWajJ-Hz3JqFrqZ3pcHI83idnOqKM3Y-odV3CE05DVCeV349ZGNujFN703Sncjkbs/s1600/a.jpeg" with your slide image url.

Ok.Now we have configured frist slide in the slider.Also you can configure other 4 slides, like this.

How To Configure First(Top) Navigation Menu

Find <div id='catmenucontainer'> inside your template.(using CTRL+F).This is the beginning of the first navigation menu.Now follow the steps given here:

How To Configure a Navigation Menu


How To Configure Second Navigation Menu

Find <div id='foxmenucontainer'> inside your template.(using CTRL+F).This is the beginning of the first navigation menu.Now follow the steps given here:

How To Configure a Navigation Menu

How To Add a Header Logo

You can add a header logo for this template easily in the "Page Elements" section(Blogger Default Method).

If you have any problem regrading this template,leave a comment below.

Important !!!:

Please do not remove the footer credit. I spend several hours to create this blogger template. So that you can use it for your blog. All I ask is, stay the credit intact.

License:

This free Blogger template is licensed under the Creative Commons Attribution 3.0 License,which permits both personal and commercial use.
However, to satisfy the 'attribution' clause of the license, you are required to keep the footer links intact which provides due credit to its authors. For more specific details about the license, you may visit the URL below:
http://creativecommons.org/licenses/by/3.0/

Thursday, November 18, 2010

Infrared Blogger Template

Infrared Blogger Template


Template name : Infrared

Template type : 1 Sidebar, 2 Column, 4 Column footer, Adapted from Wordpress, Featured Section, Fixed width, Header Banner, Magazine, Premium, Right Sidebar, Top Navigation Bar, Red, Rounded corners

Release date : November 19, 2010

Coder/Designer Name(s) : Lasantha Bandara / Web2feel

Coder/Designer URL(s) : http://www.premiumbloggertemplates.com/
http://www.web2feel.com/

Basic Instructions : How to install a Blogger template

Advanced Details : http://www.premiumbloggertemplates.com/2010/11/infrared-premium-blogger-template.html


Configure Meta tags

Login to your blogger dashboard--> layout- -> Edit HTML.Now Scroll down to where you see below codes :

<meta content='DESCRIPTION HERE' name='description'/>
<meta content='KEYWORDS HERE' name='keywords'/>

Replace DESCRIPTION HERE,KEYWORDS HERE as below.

DESCRIPTION HERE:Write your blog description
KEYWORDS HERE:Write the keywords of your blog separated by comma.

How To Configure Favicon:

Login to your blogger dashboard--> layout- -> Edit HTML.Now Scroll down to where you see below code :

<link href='YOUR-FAVICON-URL' rel='shortcut icon' type='image/vnd.microsoft.icon'/>

Now replace "YOUR-FAVICON-URL" with your Favicon address/url.


Configure Featured Content Slider

There is 4 featured slides in this slider.Login to your blogger dashboard--> layout- -> Edit HTML. Find below code.

You have to change 2 codes for every slide.Find these and change as the example below.

This is the 2 codes for the first slide:

Code 1 :

<div id='feature-56'>
<div class='inpost'>
<h3>Slide 1 Title Here</h3>
<p>Welcome to Blogger.Go to Blogger edit html and find these sentences.Now replace these text/sentences with your own descriptions.This theme is convert to Blogger by Premiumbloggertemplates.com ...</p>
</div>
<a href='Slide 1 Link Here'>
<img class='sidim' src='https://blogger.googleusercontent.com/img/b/R29vZ2xl/AVvXsEhavZyJRCqixLKGCtjeZ1ZCE2Jm1JOrtq0haandYuRAfn-_yCU7f2CwLqlwOjCCvFxQSu15hPCRPhRd5A-4tzYK_W-kj2X98pzsbLwlVaPO-k8iNucFBC8Q4iwQH2hzxu6pzSDMD15UfqQ/s1600/image-1-large.jpg'/>
</a>
</div>


  • Replace "Slide 1 Link Here" with your slide link(where to go when click on this slide/image).
  • Replace "Slide 1 Title Here" with your slide title.
  • Replace "https://blogger.googleusercontent.com/img/b/R29vZ2xl/AVvXsEhavZyJRCqixLKGCtjeZ1ZCE2Jm1JOrtq0haandYuRAfn-_yCU7f2CwLqlwOjCCvFxQSu15hPCRPhRd5A-4tzYK_W-kj2X98pzsbLwlVaPO-k8iNucFBC8Q4iwQH2hzxu6pzSDMD15UfqQ/s1600/image-1-large.jpg" with your large slide image url.
  • Replace "Welcome to Blogger.Go to Blogger edit html and find these sentences.Now replace these text/sentences with your own descriptions.This theme is convert to Blogger by Premiumbloggertemplates.com ..." with slide description.
NOTE : Slide images must be 650px width and 280px height.

Code 2 :

<li><a class='listab' href='#feature-56'><img class='phumb' src='https://blogger.googleusercontent.com/img/b/R29vZ2xl/AVvXsEh0TytaZAXAR84Khu6JxhBfrQ4pta8gBcsIWbZ4dLaPp6PnifKnMzNiJ0FJ7JU1H4HNPL4SceEnnSEoSVZtC8-i9_xOSgzcyYOrz0Bry-MaqDHNLczzkVHl5yhqsxtD1VqET4u12I3m8j0/s1600/image-1-small.jpg'/>
<h3>Slide 1 Title Here</h3></a></li>

  • Replace "Slide 1 Title Here" with your slide title.
  • Replace "https://blogger.googleusercontent.com/img/b/R29vZ2xl/AVvXsEh0TytaZAXAR84Khu6JxhBfrQ4pta8gBcsIWbZ4dLaPp6PnifKnMzNiJ0FJ7JU1H4HNPL4SceEnnSEoSVZtC8-i9_xOSgzcyYOrz0Bry-MaqDHNLczzkVHl5yhqsxtD1VqET4u12I3m8j0/s1600/image-1-small.jpg" with your small slide image url.


Ok.Now we have configured first slide in the slider.Also you can configure other 3 slides, like this.

How To Configure First(Top) Navigation Menu

Find <div id='catmenucontainer'> inside your template.(using CTRL+F).This is the beginning of the first navigation menu.Now follow the steps given here:

How To Configure a Navigation Menu


How To Configure Second Navigation Menu

Find <div id='foxmenucontainer'> inside your template.(using CTRL+F).This is the beginning of the first navigation menu.Now follow the steps given here:

How To Configure a Navigation Menu

How To Add a Header Logo

You can add a header logo for this template easily in the "Page Elements" section(Blogger Default Method).

If you have any problem regrading this template,leave a comment below.

Important !!!:

Please do not remove the footer credit. I spend several hours to create this blogger template. So that you can use it for your blog. All I ask is, stay the credit intact.

License:

This free Blogger template is licensed under the Creative Commons Attribution 3.0 License,which permits both personal and commercial use.
However, to satisfy the 'attribution' clause of the license, you are required to keep the footer links intact which provides due credit to its authors. For more specific details about the license, you may visit the URL below:
http://creativecommons.org/licenses/by/3.0/